Torres del Paine: W Trek and O Circuit Guide
Trekking Torres del Paine: the W versus the O, refugios and camping, the weather, and the planning that has to happen early.
In this guide
- Quick Facts
- Patagonia's Crown Jewel
- Getting to Puerto Natales: The Journey South
- Puerto Natales: Your Basecamp
- The W vs. The O: Choosing Your Trek
- The Three Great Sights
- The Booking Maze: Refugios and Campsites
- When to Go: Navigating the Seasons
- Patagonian Weather and What to Pack
- On the Trail: Water, Wildlife, and Rules
- Day Hikes and Shorter Stays
- A Photographer's Patagonia
- Explore in Depth
- Frequently Asked Questions
- Final Thoughts
This guide is part of our Chile Travel Guide: Atacama, Lakes and Patagonia — start there for the overview, when to go and how to get around.
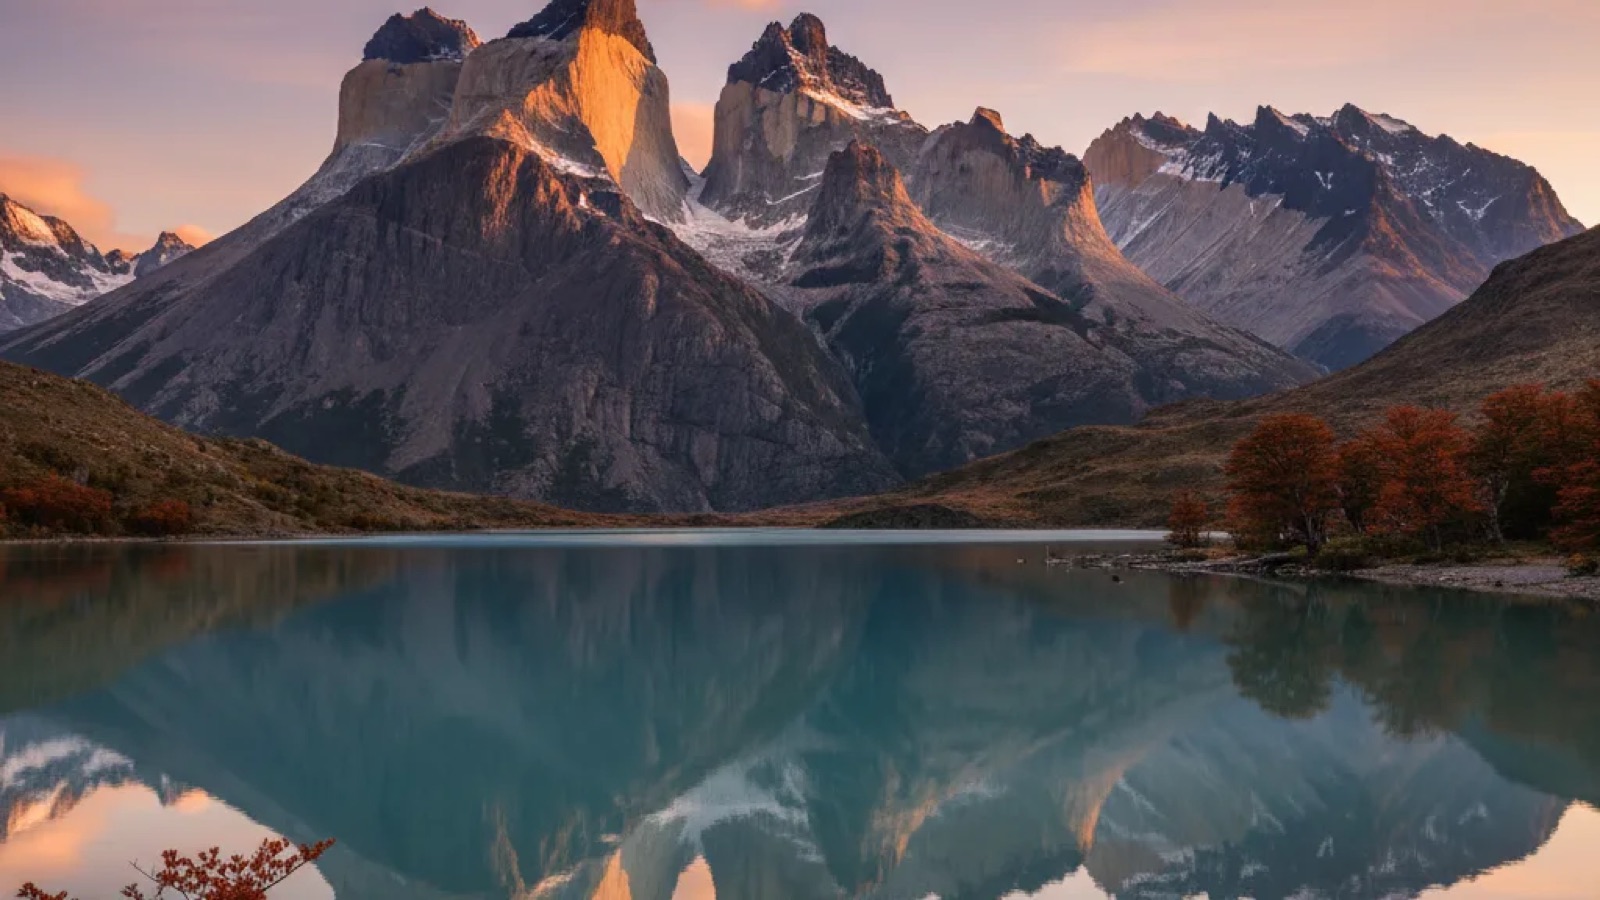
The classic way to see the towers is at sunrise. Trekkers set off by head-torch in the pre-dawn blackness, in the kind of deep, biting Patagonian cold that seeps right into your bones, scrambling uphill for over an hour towards the final moraine. As the sky bleeds from inky blue to a soft, bruised purple, the three granite towers, the Torres del Paine, catch the first rays of sun. They ignite, turning a fiery, impossible shade of orange-pink that reflects in the glacial lake below. This place isn't just a trek; it’s a pilgrimage.
Torres del Paine National Park is the crown jewel of Chilean Patagonia, a world of granite spires, impossibly blue lakes, and sprawling glaciers that has rightfully earned its legendary status. Planning a trip here, however, can feel as daunting as the landscape itself. This guide aims to demystify it all. We’ll break down the difference between the famous W Trek and the full O Circuit, navigate the notoriously complex booking system for accommodation, and cover the all-important logistics—from getting there to what to pack. Whether you’re planning a five-day highlights trip or a nine-day immersion, this is the practical advice you need before your boots first hit the trail.
Quick Facts
- Location: Magallanes and Chilean Antarctica Region, Southern Chilean Patagonia.
- Main Gateway: Puerto Natales, a small city about two hours by road from the park's southern entrance.
- Getting There: Fly into Punta Arenas (PUQ) in Chile or El Calafate (FTE) in Argentina, then take a multi-hour bus to Puerto Natales.
- Getting Around: Within the park, it's buses, shuttles, a catamaran, and your own two feet. A private vehicle offers flexibility for day trips but isn't used for the multi-day treks.
- Language & Currency: Spanish is the official language. Park staff and guides in tourist areas often speak English. The currency is the Chilean Peso.
- Best Time to Visit: The main trekking season runs from November to March. December to February is peak season with the best (though still unpredictable) weather.
Patagonia's Crown Jewel
Nothing quite prepares you for the sheer drama of Torres del Paine. It’s not about extreme altitude; the highest peak, Paine Grande, reaches only about 2,900 metres. It’s about the verticality. These mountains don't gently rise from foothills; they explode straight up from the flat, windswept Patagonian steppe. The park is a UNESCO Biosphere Reserve, a compact masterpiece of staggering diversity. In a single day you can walk from grassy plains grazed by guanacos, through dense southern beech forests, and onto the terminal moraine of a creaking glacier.
The centrepiece is the Cordillera Paine, the granite massif that gives the park its name. Its most famous features—the three ‘Towers’ (Torres), the horn-like ‘Horns’ (Cuernos), and the blade of Paine Grande—form the backdrop for the region’s most iconic treks. This is a landscape in motion, carved by ice and battered by wind, and to walk through it is to feel both humbled and incredibly alive.
Getting to Puerto Natales: The Journey South
Your Torres del Paine adventure almost certainly begins in Puerto Natales, the essential staging post for the park. Getting there is the first leg of the journey. Most travellers arrive via one of two airports.
The most common route is to fly from Santiago (SCL) to Punta Arenas (PUQ) in Chile. From the airport in Punta Arenas, it’s a comfortable, scenic bus ride of about three hours north to Puerto Natales. Several bus companies ply this route daily, and it's usually straightforward to book a ticket upon arrival, though booking ahead online is wise in peak season.
The alternative, particularly if you're coming from the Argentinian side of Patagonia, is to fly into El Calafate (FTE), the gateway to the Perito Moreno Glacier. From El Calafate, it's a longer bus journey (around five hours, including a sometimes slow border crossing) to Puerto Natales. This route makes perfect sense if you’re combining Torres del Paine with a visit to Argentinian Patagonia, which is well worth doing if you have the time.
Puerto Natales: Your Basecamp
Once a sleepy port servicing the region's sheep ranches, Puerto Natales has transformed into a bustling, trekker-focused town. It has a frontier-town feel, with a mix of gritty local life and slick outdoor shops lining the streets. This is where you make your final preparations. You’ll find everything you need here: supermarkets for trail snacks, gear rental shops for trekking poles or sleeping bags, and plenty of restaurants for one last hearty meal.
Many hostels and hotels hold a daily ‘briefing’ or ‘charla’ where an experienced staff member walks new arrivals through the trek logistics, current trail conditions, and bus schedules. These are invaluable, especially for first-timers. It’s a great chance to ask last-minute questions and meet fellow hikers. Use your time here to double-check your pack, pick up your park entrance tickets if you haven't booked online, and confirm your bus times. This is your last taste of town life before you plunge into the wild.
The W vs. The O: Choosing Your Trek
This is the biggest decision you'll make. Both treks are incredible, but they offer very different experiences. The names come from the shape of the routes on a map.
The W Trek
The W is the classic, more popular route, covering the park's three main valleys in roughly four to five days. It’s a highlights reel, taking in all the big-ticket sights: the ascent to the Base of the Towers, the stunning French Valley, and the face of the mighty Grey Glacier. It's an out-and-back journey, so you'll hike into a valley and then retrace your steps to continue along the main trail. Because it’s shorter and logistically simpler, it's the choice for most visitors who are tighter on time or looking for a slightly less strenuous undertaking.
The O Circuit
The O Circuit, or Paine Circuit, is the full loop around the entire Paine Massif. It incorporates the entire W trek but adds a remote and spectacular three-to-four-day section on the "back" side. This part of the trail is quieter, wilder, and feels a world away from the busier sections of the W. The total trek takes around seven to nine days. A key point is that the O Circuit must be walked in an anticlockwise direction. This is a rule enforced by the park authority (CONAF) to manage trail flow and environmental impact. The reward for the extra effort is solitude, different perspectives of the mountains, and the epic challenge of crossing the John Gardner Pass, the highest point on the trek, where you get your first breathtaking view of the Grey Glacier spilling down from the Southern Patagonian Ice Field.
The Three Great Sights
Whether you choose the W or the O, your journey will centre around these three unforgettable valleys.
The Base of the Towers (Base de las Torres)
This is the park's signature vista. The final section of the hike is a tough, one-hour scramble up a steep moraine field of loose rock. It’s a leg-burner, but the view that awaits you is one of the greatest in the hiking world. You arrive at a small glacial lake, and rising vertically from its shore are the three colossal granite towers. For photographers, making the pre-dawn hike to catch the sunrise here is a non-negotiable rite of passage.
The French Valley (Valle del Francés)
This is arguably the most dramatic and sonically impressive part of the trek. As you walk up the valley, you’re flanked by hanging glaciers clinging to the mountainsides. The constant thunderous roar you hear isn’t weather; it’s the sound of avalanches calving from the Francés Glacier on one side and the Italiano Glacier on the other. You can watch huge chunks of ice and snow crash down the rock faces from a safe distance. The view from the final lookout, Mirador Britanico, is a staggering 360-degree amphitheatre of granite peaks.
Grey Glacier (Glaciar Grey)
Your third "arm" of the W brings you face-to-face with an arm of the Southern Patagonian Ice Field. Grey Glacier is a vast river of ancient, blue-streaked ice that flows into the milky-turquoise waters of Lago Grey. The trail offers several viewpoints, but the most powerful experience is standing on the shore of the lake, watching colossal blue icebergs—calved from the glacier's face—drift past on the wind. The scale is simply mind-bending.
The Booking Maze: Refugios and Campsites
This is the most critical and often most frustrating part of planning a trip to Torres del Paine. You cannot simply show up and hike. It is mandatory to have reservations for every single night you spend inside the park. You will be asked for proof of your bookings at park entrances and at checkpoints along the trail.
The accommodation—a mix of campsites and rustic dorm-style lodges called refugios—is managed by two separate concession companies. This means you will likely need to make bookings on at least two different websites to piece together your itinerary, as one company manages some sites and the other company manages the rest. There are also a few free campsites managed by the park authority, CONAF, though their availability and booking systems can change season to season.
Here's the hard truth: spaces sell out months, sometimes even a year, in advance for the peak season (December to February). This cannot be stressed enough. If you want to hike the W or the O, you must plan and book as early as possible. The booking process can be confusing, and websites can be tricky to navigate. Be patient. The rules, booking windows, and which company manages which site can and do change, so your most important resource is the official park website and the websites of the concession holders. Check them relentlessly for the most current information.
When to Go: Navigating the Seasons
The main trekking season runs from spring to autumn in the southern hemisphere. The park is technically open year-round, but winter trekking (June-August) is a serious undertaking requiring specialist gear and certified guides, with many trails and services closed.
Peak Season (December to February): This is Patagonian summer. You'll have the longest daylight hours (it’s light until after 10 pm) and the highest chance of stable, sunny weather—though "stable" is a very relative term here. It's also the busiest and windiest time. Trails will be crowded, and accommodation will be fully booked far in advance.
Shoulder Seasons (November and March): These are arguably the best times to visit. The crowds are thinner, and while the weather is more of a gamble, you can get stunning, calm days. In March, the forests begin to turn, and the landscape is painted in beautiful autumnal colours of red and orange. In November, you have the freshness of spring and more snow on the high peaks. The famous Patagonian wind also tends to be slightly less ferocious during these months.
Patagonian Weather and What to Pack
There's a famous saying in Patagonia: you can experience all four seasons in a single day. A hike can start in brilliant sunshine, be battered by horizontal sleet an hour later, and finish in calm, cool sunshine. The wind is the defining element; it's a relentless, powerful force that can knock you off balance if you're not prepared.
Your packing strategy must be built around layering. Forget a single, heavy winter jacket. You need a system:
- Base Layer: Merino wool or synthetic top and bottoms that wick sweat away from your skin.
- Mid Layer: A fleece or a lightweight insulated jacket that provides warmth. Carrying one of each is a good idea.
- Outer Shell: This is your most important piece of gear. A high-quality, fully waterproof and windproof jacket and trousers are non-negotiable. It's your shield against the elements.
Beyond clothing, trekking poles are essential. They provide stability in the wind, take a huge amount of strain off your knees on the steep descents (especially from the Towers), and help with balance on river crossings. Sturdy, broken-in waterproof hiking boots are another absolute must, and investing in good boots pays off on every step.
On the Trail: Water, Wildlife, and Rules
One of the joys of trekking in Torres del Paine is the water. For most of the trek, you can drink directly from the countless streams and rivers flowing down from the glaciers. The water is pure, ice-cold, and delicious. It means you only need to carry a single bottle and can fill it up regularly. Always fill from fast-flowing sources, and if you are ever unsure, it’s best to use a filter or purification tablets.
Wildlife is abundant. You are certain to see large herds of guanacos (a wild relative of the llama), often silhouetted on ridgelines. Keep an eye out for the majestic Andean Condor soaring on the thermals above. The park is also home to one of the highest concentrations of pumas in the world. While sightings are rare for trekkers on the main trails (they are most often seen on specific guided tours in more remote areas), it’s a powerful reminder that you are in a truly wild place.
The most important rule in the park is about fire. Due to devastating human-caused fires in the past, restrictions are incredibly strict. You can only use a camping stove in designated cooking shelters at the official refugios and campsites. No open fires are permitted anywhere, at any time. The penalties for breaking this rule are severe. Respect it, and help protect this fragile environment.
Day Hikes and Shorter Stays
Don't have five days for a trek? You can still experience the magic of Torres del Paine. The most popular day hike is the trek to the Base of the Towers. It's a long, challenging day (around 8-9 hours round trip), but completely doable. You can take an early bus from Puerto Natales to the park, complete the hike, and take a late bus back.
Another fantastic option is to focus on the western side of the park. You can take a bus and the catamaran across Lago Pehoe to the Paine Grande area. From there, you could do a partial day hike towards the French Valley or, better still, head to the Grey Glacier sector. A boat tour on Lago Grey will take you right up to the face of the glacier, navigating between giant blue icebergs. It is an absolutely unforgettable experience and gives you a real sense of the glacier's immense scale without a multi-day commitment.
A Photographer's Patagonia
Torres del Paine is a photographic paradise, but one that makes you work for the shots. The light is fleeting and the weather is your biggest challenge and greatest asset. Dramatic, fast-moving clouds create a sense of mood and scale that clear blue skies just can't match.
My three favourite shots to chase are:
- Sunrise at the Base of the Towers: This is the classic for a reason. You need a head-torch, determination, and a tripod. The alpenglow on the granite only lasts for a few minutes, so be ready. The real magic happens just before the sun hits the peaks, when the colour is soft and pink.
- The Cuernos from Lago Pehoe: The jagged, two-toned horns of the Cuernos del Paine reflected in the turquoise water of Lago Pehoe is another iconic image. You can capture this from various points along the W trek, particularly around the Pehoe catamaran dock and on the trail between Refugio Paine Grande and the French Valley.
- Icebergs at Lago Grey: Walking along the shore of Lago Grey, use a wide-angle lens to get low and close to the beached icebergs, using them as a foreground element with the vast glacier in the background. The textures and deep blues of the compressed ice are mesmerising. A polarising filter is your best friend here, as it will cut the glare on the water and ice, deepening the colours.
Explore in Depth
This guide focuses on the trekking heart of Patagonia, but it's just one piece of the puzzle. For a broader look at the country's incredible diversity, from the driest desert on earth to the fjords of the south, the complete Chile guide is the place to start.
Frequently Asked Questions
Do I really need to book campsites and refugios months in advance?
Yes, absolutely. This isn't an exaggeration. For the peak season (December-February), especially for the W trek, spots can sell out six to twelve months beforehand. The O Circuit is slightly less competitive but still requires booking many months out. The mandatory booking system is strictly enforced to manage the park's capacity and protect the environment. Planning last-minute is almost impossible, so making your reservations should be the very first thing you do once you decide on your dates.
Can I wild camp in Torres del Paine to save money or be more flexible?
No, wild camping is strictly forbidden throughout the entire national park. You must stay in one of the official, pre-booked campsites or refugios each night. This rule is in place for critical safety and environmental reasons, including waste management and preventing wildfires, which have devastated the park in the past. Park rangers patrol the trails and will enforce this rule with significant penalties, so please plan to stay in the designated areas.
How fit do I need to be for the W Trek?
You need a solid level of fitness. You don’t need to be a mountaineer, but you should be comfortable walking for 6-8 hours a day, over multiple consecutive days, with a backpack. The trails involve significant ascents and descents on uneven, rocky terrain. The hike to the Base of the Towers and the walk up the French Valley are particularly strenuous. It’s worth training beforehand by doing long day hikes with a weighted pack to prepare your legs and shoulders.
For the W Trek, is it better to hike west-to-east or east-to-west?
Both directions have their pros. The more traditional east-to-west route (starting with the Towers) means you tackle the hardest climb on your first day with fresh legs. The west-to-east route (starting at Paine Grande and ending with the Towers) means you have the prevailing wind at your back for much of the trek, which can be a huge advantage. It also saves the most famous landmark, the Towers, for a grand finale on your last day, which makes west-to-east the stronger choice for many trekkers.
What is the single most important piece of gear I should bring?
Without a doubt, a high-quality, reliable waterproof and windproof shell jacket. The Patagonian wind is no joke; it can chill you to the bone and turn a light rain into a piercing downpour. Your outer shell is your armour against the elements and the piece of gear that will most directly impact your comfort and safety on the trail. Don't skimp on it. Good waterproof trousers are a very close second!
Final Thoughts
Torres del Paine is a place that challenges you. It will test your legs, your patience with the weather, and your planning skills long before you even arrive. But the rewards are immeasurable. There are moments on that trail—watching a condor ride an updraft in the French Valley, hearing the ice crack on Grey Glacier, standing breathless before the sun-kissed Towers—that will stay with you forever.
It’s a landscape that reminds you of nature’s raw power and your own small place within it. The effort required is part of the magic; it strips away the non-essentials and focuses you on the simple rhythm of walking, breathing, and looking. Prepare well, respect the rules, and go. You’ll come back with tired muscles, a full memory card, and a profound appreciation for one of the most beautiful corners of our planet.