First International Trip: A Complete Checklist
A practical checklist for your first overseas trip: passports, visas, insurance, money, packing, flights and what to do on arrival.
In this guide
- First-Timer's Essentials
- 3-6 Months Before You Go: The Big Picture
- Getting Your Wings: Flights and Health
- 2-3 Months Out: Visas, Insurance, and a Place to Sleep
- 1 Month Out: Money, Meds, and Documents
- Subscribe to Travel Advice & Stay Informed
- 1 Week to Go: Packing and Digital Prep
- Departure Day: Navigating the Airport
- Arrival: Hitting the Ground Running (Sensibly)
- While You're Away: Staying Safe and Savvy
- Explore in Depth
- Frequently Asked Questions
- Final Thoughts
That feeling is exactly why this guide exists. Your first international trip is one of the most exciting things you’ll ever do, but the lead-up can feel overwhelming. It’s a mountain of paperwork, planning, and what-ifs. This isn't just a checklist; it's a timeline. It’s a step-by-step roadmap designed to get you from your living room to that ‘wow’ moment on the other side of the world with confidence and calm. Let’s get you organised, packed, and ready for the adventure of a lifetime.
First-Timer's Essentials
- Passport Rule #1: Your passport must be valid for at least six months from your planned date of departure from the last country you visit. Many countries will deny you entry if it isn't.
- Visas: It is always your personal responsibility to check and secure the correct visas for your nationality. Do not rely on hearsay; use official government embassy or immigration websites only.
- Travel Insurance: This is not optional. It is your single most important purchase after your flight. Comprehensive medical and evacuation cover is the bare minimum.
- Money: Organise a mix of payment methods. Relying on a single card is a recipe for disaster. Inform your bank of your travel dates to avoid your cards being frozen.
- Government Travel Advice: Subscribe to your government's travel advisory service (like Smartraveller for Australians) for destination updates. Australia no longer takes pre-trip registrations, though DFAT opens crisis registration when an emergency occurs.
- Be Flexible: This is the golden rule. Your meticulously planned itinerary will inevitably change. Embrace it. The best travel moments are often the ones you didn't plan for.
3-6 Months Before You Go: The Big Picture
This is the dream phase, but it’s also when you need to lay the most important groundwork. Your first port of call is your passport. Find it. Now. Check the expiry date. Is it valid for at least six months after you plan to come home? If not, you need to begin the renewal process immediately, as it can take several weeks or even months. Next, flick through the pages. Do you have at least two to four completely blank pages? Some countries require a full blank page for their entry and exit stamps, and airlines can deny you boarding if you don't have them.
With passport admin underway, you can properly dive into choosing a destination. For a first trip, it’s wise to pick somewhere with a well-established tourism infrastructure. Think countries in Southeast Asia like Thailand or Vietnam, or the classic European circuit. These places are generally easier to navigate, have plentiful accommodation options, and offer a softer landing for a novice traveller. Ask yourself: what do I want from this trip? Ancient ruins and bustling cities? Towering mountains and quiet trails? Your answer will narrow the map considerably.
Finally, start thinking about your budget. Don't get fixated on a final number just yet. Instead, think in terms of a daily average. Research the general cost of living in your potential destinations. Is it a region where you can get by on a shoestring, or will you need a more generous daily allowance for food, transport, and activities? This early research helps set realistic expectations and informs how long you can afford to travel for. For photographers, this is also the time to research—looking up potential locations on a map, checking the position of the sun at different times of day, and getting a feel for the visual story you want to tell.
Getting Your Wings: Flights and Health
Once you’ve settled on a destination and timeframe, it’s time to book flights. Generally, the sweet spot for booking international flights is three to five months in advance. Use flight comparison websites to get a broad overview of prices and routes, but book directly with the airline where possible. It makes managing your booking or dealing with any changes significantly easier than going through a third party. Pay close attention to layover times—anything less than 90 minutes for an international connection is risky, and multi-hour layovers can be draining. Look for the balance that works for you.
Before you hit 'confirm' on those non-refundable flights, book an appointment with your GP or a specialised travel doctor. Do this at least two months before you go. Discuss your itinerary and ask about recommended or required vaccinations for the regions you're visiting. Some vaccinations, like Yellow Fever, are mandatory for entry into certain countries, while others, like Hepatitis A and Typhoid, are just extremely good ideas. Some require a course of several injections over a few weeks, so you can't leave this to the last minute.
2-3 Months Out: Visas, Insurance, and a Place to Sleep
Okay, it’s getting real. This is the admin-heavy phase. First up: visas. Visa requirements are complex, country-specific, and depend entirely on the passport you hold. Start by searching for the embassy or consulate website of the country you plan to visit. For example, search "Embassy of [Country] in Australia". This is the only source of truth. Be wary of third-party visa agencies that charge exorbitant fees for simple applications. Many countries now have e-visa systems that are relatively straightforward to use yourself. Read every instruction carefully, triple-check your details, and apply well in advance. Visa processing times can vary wildly.
Next, travel insurance. Do not leave home without it. Your domestic health cover will not help you overseas. When choosing a policy, don't just look at the price. Read the Product Disclosure Statement (PDS) and check the details. Key things to look for are a high level of cover for overseas medical expenses and, crucially, medical evacuation and repatriation. Also check the policy for theft or loss of valuables, and cancellation cover for unforeseen events. And be honest! Disclose any pre-existing medical conditions and declare if you plan on doing any "adventure" activities like skiing or scuba diving, as you may need to add extra cover.
With the serious stuff sorted, you can get back to the fun part: booking a place to sleep. For your first trip, book at least your first few nights' accommodation in advance. Knowing you have a definite place to go after a long-haul flight is a huge relief. It removes the stress of trying to find a room while jet-lagged and overwhelmed. You don’t need to book every single night for a long trip—leaving some flexibility is great—but securing that initial landing pad is a smart move.
1 Month Out: Money, Meds, and Documents
You’re on the home stretch. It's time to sort out your finances. Contact your bank(s) and let them know the dates and countries you’ll be travelling to. This prevents their fraud detection systems from automatically freezing your cards when they see a strange transaction from the other side of the world. It’s also wise to have more than one way to access your money. A combination of a debit card for ATM withdrawals, a credit card for larger purchases, and a travel money card can be a good strategy. It's also worth carrying a small amount of emergency cash in a major currency like US Dollars or Euros, hidden separately from your main wallet.
If you plan on driving or riding a scooter, you’ll likely need an International Driving Permit (IDP). In Australia, you can get these easily from your state's motoring association. Check the specific requirements for your destination, as some countries require the IDP in addition to your Australian licence.
This is also the time to visit your doctor for any personal medications you need. Get a letter from your GP that lists the medications, the dosage, and states that they are for your personal use. Keep medications in their original packaging. This documentation can be essential if you're questioned by customs officials.
Finally, this is the crucial 'photocopy day'. Make at least two physical photocopies of your passport photo page, visas, flight tickets, and travel insurance policy. Keep one set in your carry-on and one in your checked luggage. Even better, scan or take clear photos of these documents and save them to a secure cloud service (like Google Drive or Dropbox) and also email them to yourself and a trusted family member back home. If you lose everything, having digital access can be a lifesaver.
Subscribe to Travel Advice & Stay Informed
This is a quick but vital step. Before you go, subscribe to your government's travel advice. For Australians, this is the Smartraveller website, run by the Department of Foreign Affairs and Trade (DFAT); trip registration ended in 2019, but subscribers receive advisory updates and DFAT opens a crisis registration portal if an emergency, like a natural disaster or civil unrest, occurs. Many other countries still run trip-registration systems. Subscribing also gives you access to the latest travel advisories and safety information for your destination. Reading these advisories is an important part of your pre-trip research, helping you understand local laws, cultural sensitivities, and any specific safety concerns.
1 Week to Go: Packing and Digital Prep
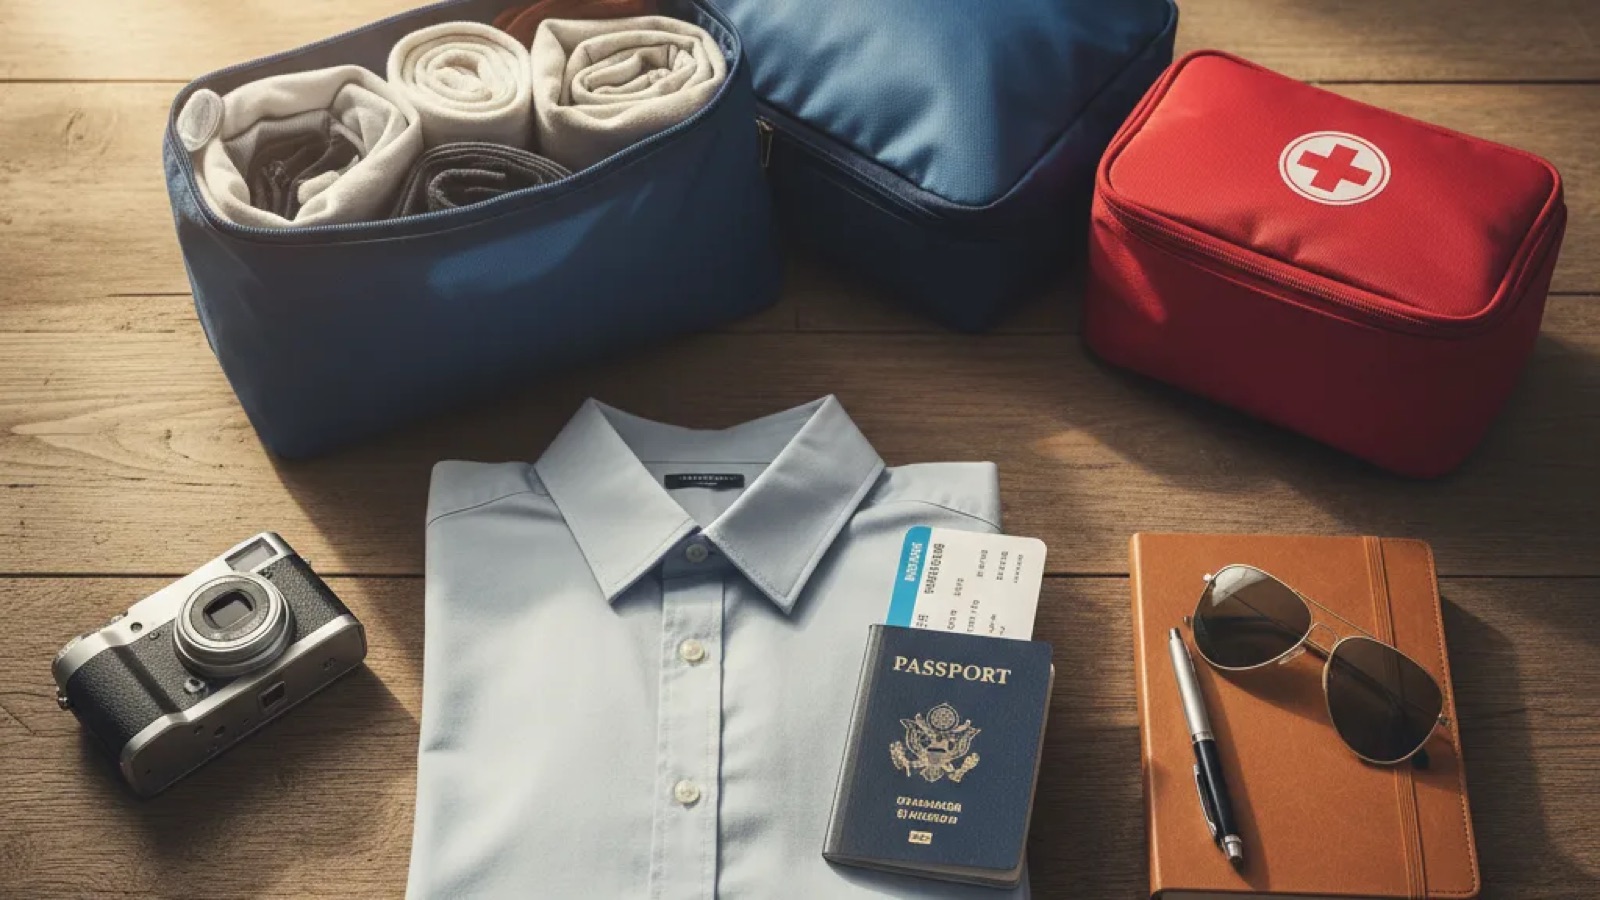
The excitement is probably reaching fever pitch. It’s time to pack. My number one rule: you need less than you think. Lay out everything you want to take, and then halve it. Seriously. Hauling a monstrously heavy bag through crowded train stations is a travel rite of passage most of us only need to experience once. Check your airline's luggage allowance for both checked and carry-on bags—pay special attention to the carry-on weight limit, as budget airlines can be incredibly strict. Rolling your clothes saves a surprising amount of space, and packing cubes are a traveller’s best friend for staying organised.
Beyond clothes, focus on your digital prep. Your phone is your most powerful travel tool. Download offline maps of the cities you're visiting using an app like Google Maps—this is a life-saver when you don’t have Wi-Fi or a local SIM. Download a translation app, your airline's app for easy check-in and boarding passes, and any podcasts, music, or movies you want for the flight. A portable power bank is non-negotiable for keeping your devices charged on the go. If you're bringing a camera, this is also the time for a final gear check—charge all batteries, clear memory cards, and pack your lens cloths.
Departure Day: Navigating the Airport
The day has arrived! My advice for airport day is simple: arrive early. For an international flight, that means at least three hours before departure. It might seem excessive, but it builds in a buffer for traffic, long check-in queues, or unexpected security delays. It turns a potentially stressful rush into a relaxed start to your holiday.
Check in online beforehand if you can. Once at the airport, drop your bags, and head for security. Remember the liquids rule for carry-on luggage: all liquids, aerosols, and gels must be in containers of 100ml or less, and all of these containers must fit into a single, transparent, resealable plastic bag. Have this bag ready to pull out of your carry-on to speed things up.
If you have a layover, check your flight details as soon as you land. Confirm your next gate and how long it will take to walk there. This dictates everything. If it's a short connection, head straight to the gate. If you have several hours, find a quiet spot, stretch your legs, rehydrate, and grab a meal. Just don't get so comfortable that you lose track of time! Before landing at your final destination, flight attendants will often hand out arrival and immigration cards. Fill these out on the plane, making sure you have the address of your first night’s accommodation handy, as it's almost always required.
Arrival: Hitting the Ground Running (Sensibly)
Congratulations, you’ve made it! After clearing immigration and collecting your luggage, your first two priorities are usually money and a data connection. Many airports have official currency exchange counters or ATMs in the arrivals hall. It’s often best to use an ATM from a reputable local bank rather than a generic currency exchange kiosk, which may have poorer rates. Next, look for an official telecommunications provider kiosk to buy a local SIM card or set up an eSIM. Having data from the moment you leave the airport makes everything–from navigating to your hotel to translating a menu–infinitely easier.
Now, for transport. Airports can be magnets for transport scams. The safest bet is to look for the official, metered taxi rank or a designated ride-share pickup zone. Avoid the touts who approach you inside the terminal offering a "special price". Have the name and address of your accommodation written down or ready on your phone to show the driver.
My strategy for the first day is all about fighting jet lag. As tempting as it is to collapse into bed, don't. Try to stay awake until a reasonable local bedtime. The best cure for jet lag is sunlight. Drop your bags, have a shower, and get outside for a gentle walk. Explore your immediate neighbourhood, find a small local restaurant for your first meal, and soak in the atmosphere. This helps reset your body clock and immediately grounds you in your new environment.
While You're Away: Staying Safe and Savvy
Travelling is incredibly safe for the most part, but being a savvy traveller is about minimising risk. Your greatest tool is situational awareness. Be mindful of your surroundings, especially in crowded tourist areas, markets, and on public transport. Don't flash expensive electronics or jewellery. A simple but effective habit is to keep one backup bank or credit card separate from your main wallet—perhaps in your luggage back at the hotel. That way, if your wallet is lost or stolen, you aren't left completely stranded.
Cultural etiquette is also a key part of staying safe and being a respectful traveller. Before you visit temples, mosques, or other religious sites, research the dress code. This often means covering your shoulders and knees. A lightweight scarf or sarong is handy for this purpose. Be mindful when taking photos, especially of people. In many cultures, it's considered rude to photograph someone without asking for permission first. A smile and a gesture towards your camera go a long way.
If the worst happens and you lose your passport, don't panic. The first thing you must do is report it to the local police and get a copy of the police report. Then, you need to contact your nearest embassy or consulate immediately. Their website will have instructions on how to apply for an emergency travel document that will allow you to continue your trip or get home. This is exactly why you keep digital and physical copies of your documents—it makes this stressful process much smoother.
Explore in Depth
Getting your pre-trip planning right is the secret to a stress-free adventure. Once you've got the basics sorted with this checklist, dive deeper with some of the other guides to fine-tune your preparation.
Frequently Asked Questions
What’s the best way to carry my passport and money safely?
Avoid keeping everything in one place. On travel days, use a slim money belt or neck pouch worn under your clothes for your passport, a primary card, and larger cash notes. Keep daily spending cash and a secondary card in a normal wallet in your front pocket or a secure bag. In your hotel room, use the room safe. If there isn't one, lock your main bag with your passport and backup cards inside. The goal is to make yourself a difficult target and ensure that even if you lose one thing, you haven't lost everything.
Should I book all my accommodation before I leave?
For a first trip, a hybrid approach works best. Definitely book your first few nights at each major destination. This eliminates the stress of finding a place to sleep when you’re tired and in a new city. However, leaving some gaps in your itinerary provides wonderful flexibility. What if you fall in love with a place and want to stay longer, or hear about an amazing town from another traveller? Having a few unplanned nights allows for spontaneity. For trips shorter than two weeks, however, booking everything in advance can provide valuable peace of mind and save time on the ground.
What happens if I miss my connecting flight?
First, don't panic. If you miss your connection due to a delay with your first flight, and both flights were booked on a single ticket with the same airline (or partner airlines), the airline is responsible for getting you on the next available flight. Go directly to the airline’s transfer desk or customer service counter in the airport. They will handle the rebooking. This is a major reason to book directly with airlines. If you booked two separate tickets with different, non-affiliated airlines, the situation is more difficult, as the second airline considers you a 'no-show' and you may have to purchase a new ticket.
Is it rude to take photos of people in other countries?
This is a great question. The golden rule is to always prioritise respect over a photo. In most cultures, taking a photo of someone, especially a close-up, without their permission is considered intrusive and rude. Make eye contact, smile, and gesture with your camera to ask for non-verbal permission. Some people will say yes, some will say no—and you must respect their decision. For general street scenes and shots of crowds, it’s usually fine. But for portraits or photos where one person is the clear subject, always ask. It often leads to a much more genuine and meaningful interaction anyway.
How much cash should I bring with me?
This depends heavily on your destination. In some countries (like in Scandinavia or even here in Australia), card payments are king and you'll barely need cash. In others (parts of Southeast Asia or South America), cash is essential for small guesthouses, street food, and local markets. Avoid carrying huge wads of cash from home. Instead, arrive with a small amount of local currency, enough for a taxi and your first meal. Then use your debit card to withdraw larger sums from local bank ATMs every few days. This avoids carrying too much cash at once and generally gives you a better exchange rate than changing money at home.
Final Thoughts
There is a definitive line in your life: before your first international trip, and after. Something shifts inside you when you successfully navigate a foreign subway system, order a meal using only gestures and a smile, or stand before a mountain or monument you’ve only ever seen in pictures. The planning can feel like a chore, a long list of tasks to tick off. But every single one of them is a stepping stone towards that moment of arrival.
Don't strive for the perfect trip. It doesn't exist. You will take wrong turns, miss a bus, and order something bizarre from a menu. These are not failures; they are the stories you will tell for years to come. The real goal is to be prepared, not to be perfect. So follow the steps, do your research, and then, when the time comes, put the checklist away. Open your eyes, open your mind, and just let the incredible, messy, beautiful experience of travel happen to you.
More Travel Tips guides
Egypt Weather Guide: The Complete Month-by-Month Breakdown
Month-by-month weather for Cairo, Luxor and the Red Sea - cool winter temple days, peak summer diving heat - so you can pick the right…

Dream Destinations: A Travel Bucket List by Region
Twenty-five bucket-list destinations across Asia, Europe, the Americas, Africa and Oceania, with planning and budget tips and common…
Best Time to Visit Thailand: Seasons by Region
Thailand's cool, hot and rainy seasons, month-by-month weather, how the north and the east and west coasts differ, shoulder-season value…