Kilimanjaro Trek Guide: Routes, Altitude, Training
Climbing Kilimanjaro: choosing a route, acclimatisation and summit night, training realistically and what the days involve.
In this guide
- Quick Facts
- The Challenge: A Walk, But Not a Walk in the Park
- Choosing Your Path: The Main Kilimanjaro Routes
- The Golden Rule: Acclimatisation and 'Pole Pole'
- A World in a Week: The Five Ecological Zones
- The Longest Night: Climbing to the Summit
- Staying Safe at Altitude: Acute Mountain Sickness (AMS)
- Gearing Up: What to Pack for Kilimanjaro
- Getting Ready: How to Train for Your Trek
- Logistics and Ethics: Guides, Porters, and Park Fees
- Photography Notes from the Mountain
- Beyond the Peak: Safari and Zanzibar
- Explore in Depth
- Frequently Asked Questions
- Final Thoughts
This guide is part of our Tanzania Safari Guide: Serengeti and Ngorongoro — start there for the overview, when to go and how to get around.
The beam from my headtorch cut a pathetic little circle in an overwhelming darkness, catching only the heels of the trekker in front and the endless, frozen scree under my boots. Every breath was a conscious effort, a ragged gasp in the thin, frigid air. It was 3 a.m. somewhere above 5,000 metres on the flank of Kilimanjaro. My thighs burned, my head throbbed, and a little voice was screaming at me to just stop, sit down, and give up. We’d been walking for hours, a silent, shuffling line of ghosts snaking up the impossible slope. Then, I looked east. A faint, almost imperceptible line of deep indigo had appeared above the jagged silhouette of Mawenzi peak. Dawn was coming. And with it came a surge of hope, a brutal, beautiful promise that the roof of Africa was within reach.
Standing on Uhuru Peak is an achievable dream for any fit and determined traveller. Kilimanjaro is not a technical climb; you don’t need ropes or mountaineering skills. It is, for all intents and purposes, a walk. But it's a walk to nearly 6,000 metres, where oxygen is scarce and the body begins to protest. In this guide, I’ll take you through everything I’ve learned about tackling this magnificent mountain. We’ll cover choosing the right route for you, how to train, what to pack, the realities of altitude, and the logistics of organising a safe and ethical trek that will stay with you for the rest of your life.
Quick Facts
- Location: Northern Tanzania, near the towns of Moshi and Arusha.
- Getting There: Most trekkers fly into Kilimanjaro International Airport (JRO). Your trek operator will typically arrange transfers from the airport to your hotel.
- Getting Around: All transport to the park gates, between camps, and back to your hotel is organised by your licensed trek operator as part of your package. You cannot climb independently.
- Language & Currency: Swahili and English are the official languages. Your guides will be fluent in English. The local currency is the Tanzanian Shilling, though US Dollars are widely accepted for tourism activities, especially tipping.
- Best Time to Visit: The main dry seasons offer the best trekking conditions: from roughly June to October, and from January to mid-March.
The Challenge: A Walk, But Not a Walk in the Park
Let's be perfectly clear: you don't climb Kilimanjaro, you walk up it. The paths on most routes are well-trodden and require no technical skill. You won't be using ice axes or harnesses. So why does it have such a fearsome reputation? The answer is one word: altitude.
At the summit, Uhuru Peak, you are standing at 5,895 metres (19,341 feet). The air pressure there is less than half of what it is at sea level. This means for every breath you take, you are getting less than half the oxygen your body is used to. This is the single greatest challenge and the primary reason why some trekkers fail to reach the summit. Your fitness level matters, but your body’s ability to acclimatise to the thin air matters more. Marathon runners can be forced to turn back while slow-and-steady walkers make it to the top. The mountain demands respect, patience, and a willingness to listen to your body.
Choosing Your Path: The Main Kilimanjaro Routes
The route you choose is the single biggest decision you'll make. It dictates the scenery, the cost, the crowds, and most importantly, your acclimatisation profile. A longer trek is always better. The extra day or two might feel like an added expense, but it drastically increases your chances of summiting safely and actually enjoying the journey. Remember that success rates are directly linked to the number of days spent on the mountain.
The Main Contenders
- Marangu Route (5-6 days): Often called the "Coca-Cola" route, this is the oldest and most established path. It’s the only route that offers accommodation in communal A-frame huts instead of tents. It follows a relatively gentle gradient but has a reputation for lower success rates. Why? Because its shorter, five-day itinerary offers very poor acclimatisation. You ascend very quickly, which is a recipe for altitude sickness. The trail is also walked in both directions, so you see the same scenery on the way down.
- Machame Route (6-7 days): Nicknamed the "Whiskey" route, this is now the most popular choice. It’s tougher and steeper than Marangu, but much more scenic, traversing from the west and circling around to the southern ice fields. Crucially, it has an excellent "climb high, sleep low" profile, which is fantastic for acclimatisation. A seven-day itinerary on this route gives you a very strong chance of success. This was the route of my first Kili trek, and it’s a brilliant all-rounder.
- Lemosho Route (7-9 days): My personal favourite. Lemosho offers breathtaking scenery and an outstanding acclimatisation profile. It starts further west, offering a quiet first couple of days through pristine rainforest before joining the Machame route. The journey across the vast Shira Plateau is spectacular. It's more expensive due to longer logistics, but for a beautiful, less-crowded experience with one of the highest success rates, it’s hard to beat.
- Rongai Route (6-7 days): This is the only route that approaches Kilimanjaro from the north, close to the Kenyan border. Its key advantage is that the northern slopes lie in a rain shadow, meaning it receives less precipitation. This makes it a great choice if you must travel during the shoulder or even rainy seasons. The scenery is less varied on the initial days, but the northern perspective is unique. Descent is via the Marangu route.
- Northern Circuit (9-11 days): The longest and newest route, and the undisputed king of acclimatisation. This path circumnavigates almost the entire mountain, offering incredible 360-degree views and a perspective few trekkers get to see. It’s the least crowded and has the highest success rate. If you have the time and the budget, this is the ultimate Kilimanjaro experience.
- Umbwe Route (5-6 days): The shortest, steepest, and most direct route to the summit. It is a very tough and demanding climb with a dangerously fast ascent profile. I do not recommend this route for anyone other than highly experienced trekkers who are already pre-acclimatised from climbing another nearby peak like Mount Meru.
The Golden Rule: Acclimatisation and 'Pole Pole'
The moment you step onto the trail, your guide will utter the two most important words on Kilimanjaro: "Pole pole" (pronounced poh-lay poh-lay). It's Swahili for "slowly, slowly." It will feel unnatural at first, shuffling along at a pace that feels slower than a casual stroll. You must embrace it. Going slowly conserves precious energy and, most importantly, allows your body the time it needs to adjust to the decreasing oxygen levels. Your guides are masters of this pace. Trust them. Rushing on day one or two is a direct ticket to a headache on day three and a potential early exit on day four.
Effective acclimatisation also involves drinking plenty of water—at least three to four litres per day—and eating, even when your appetite wanes. Carbohydrates are your friend at altitude. Your crew will provide fantastic, carb-heavy meals to fuel your body for the task ahead. Listen to your body, communicate any symptoms to your guide, and always, always go pole pole.
A World in a Week: The Five Ecological Zones
Trekking Kilimanjaro is like walking from the equator to the North Pole in a week. The transition through its five distinct ecological zones is one of the most magical parts of the experience.
- Cultivation Zone (800m - 1,800m): You’ll likely only drive through this lower slope area, where local Chagga people farm coffee, bananas, and other crops.
- Rainforest (1,800m - 2,800m): Your trek begins here. A stunning, lush, and humid world of towering trees, dripping moss, and bird song. Keep your eyes peeled for the beautiful black-and-white colobus monkeys swinging through the canopy. It's often muddy, but utterly beautiful.
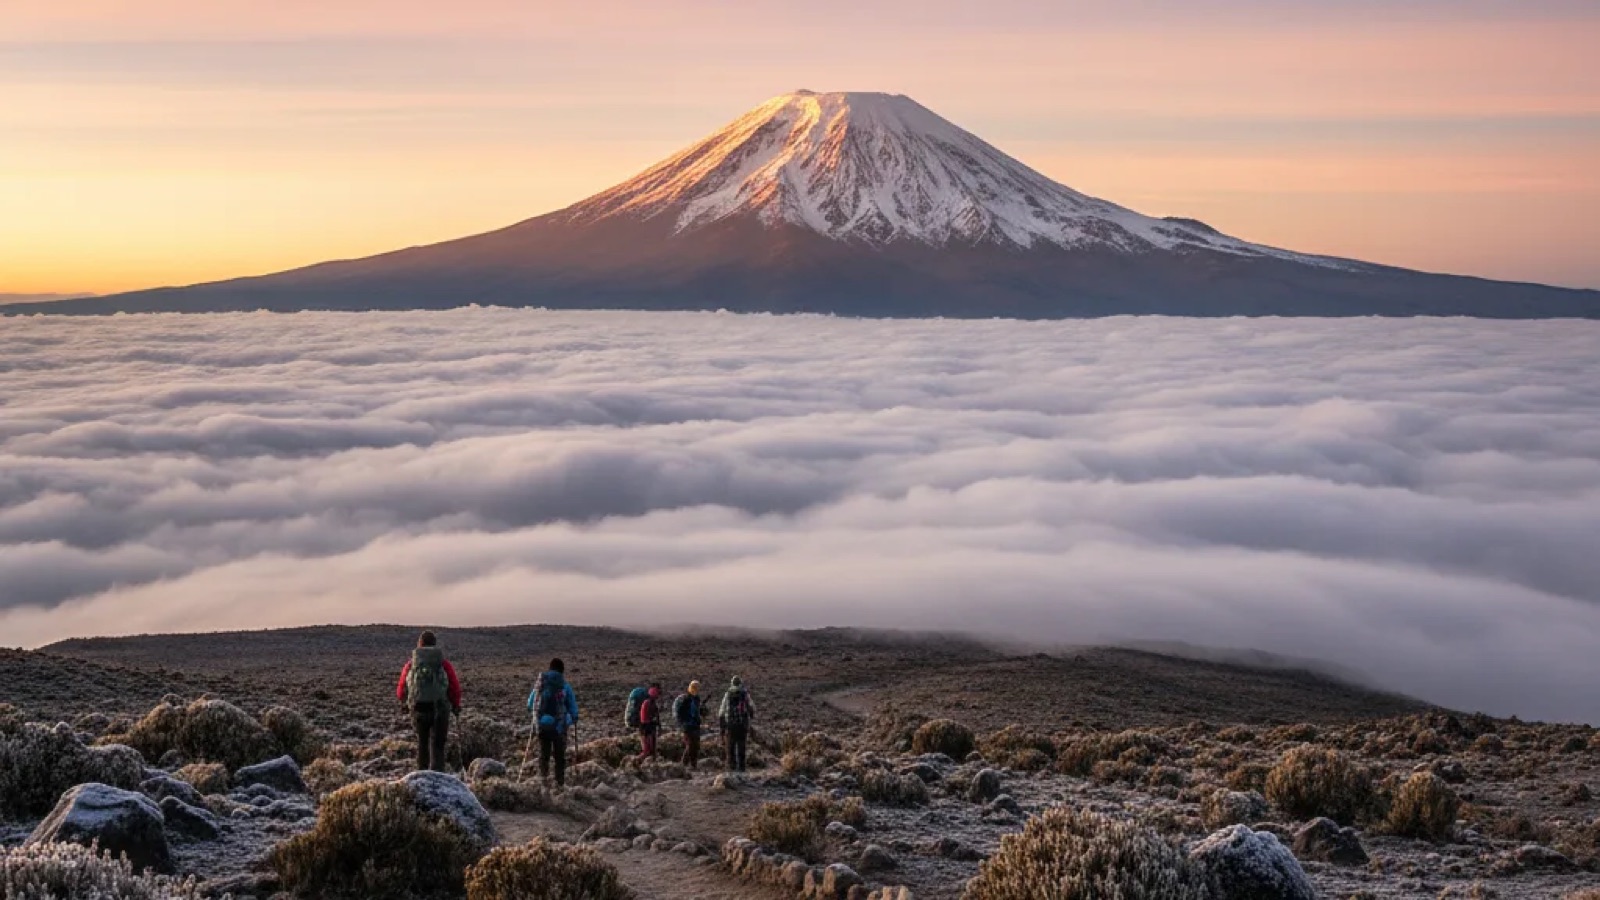
- Heath and Moorland (2,800m - 4,000m): As you climb out of the forest, the landscape opens up. Giant heathers, otherworldly groundsels, and lobelias dot a misty, rugged terrain. This is often where you climb above the clouds for the first time, looking down on a sea of white.
- Alpine Desert (4,000m - 5,000m): A stark and powerful landscape. The air is thin and dry, and vegetation is sparse. It feels like you're on another planet, hiking across a plain of scree and rock under a vast, deep blue sky. The views of the summit cone, Kibo, are constant and intimidating. This is where you really feel the altitude.
- Arctic Zone (5,000m+): The summit. A world of rock, ice, and snow. Nothing grows here. It’s a brutal, unforgiving environment, with freezing temperatures and desperately thin air. The reward for reaching it is the sight of the incredible Furtwängler and Rebmann glaciers and the view out across the curvature of the Earth.
The Longest Night: Climbing to the Summit
Summit night is the culmination of everything. It is without doubt one of the most physically and mentally gruelling things I have ever done. You’ll be woken around 11 p.m. at your high camp (usually Barafu Camp or Kibo Huts) for a light snack and hot tea. You dress in every layer you have and step out into the freezing darkness.
The climb is a slow, silent, methodical trudge. One foot in front of the other. Your headtorch illuminates a tiny patch of ground, and you follow the boots of the person in front. Your guide's voice will be a quiet, encouraging presence in the dark. The climb up the scree slope feels eternal. You'll stop for short breaks, sipping water that's trying to freeze in your bottle. The biggest battle is in your own mind.
Then, after what feels like a lifetime, you see it. The first hint of light. You reach the crater rim at Stella Point (5,756m) just as the sun breaks the horizon, bathing the clouds and ice fields in impossible shades of orange, pink, and gold. It's a moment of pure, emotional exhaustion and elation. The final push is a relatively flat, 45-minute traverse around the crater rim to Uhuru Peak (5,895m), the true summit. Standing by that famous sign, looking down on the plains of Africa, you realise every painful step was worth it.
Staying Safe at Altitude: Acute Mountain Sickness (AMS)
Altitude sickness is a serious risk on Kilimanjaro and should not be taken lightly. It's caused by ascending too quickly for your body to adapt. Mild symptoms are common and feel like a bad hangover: headache, nausea, fatigue, and loss of appetite. It's absolutely crucial that you communicate these symptoms to your guide immediately. They are trained professionals who assess trekkers every day.
The golden rule of mountaineering applies: if your symptoms are getting worse, the only cure is to descend. Mild AMS can rapidly progress to life-threatening conditions like High Altitude Pulmonary Edema (HAPE) or High Altitude Cerebral Edema (HACE). Your guides are equipped with oxygen and know the protocols, but their primary tool is taking you to a lower elevation where you will recover almost instantly.
Some trekkers choose to take a prescription medication called Acetazolamide (brand name Diamox) as a prophylactic. It can help speed up the acclimatisation process, but it's not a magic bullet and has side effects of its own. This is a personal medical decision that you must discuss with your own doctor well before your trip. Do not take medical advice from online forums or fellow travellers.
Gearing Up: What to Pack for Kilimanjaro
Packing correctly is critical. You need to be prepared for everything from tropical humidity to arctic cold. The key is a good layering system.
- Boots: This is your most important piece of kit. Get a pair of waterproof hiking boots with good ankle support. Most importantly, they must be well broken-in. Do not show up with brand new boots.
- Layering System: You'll need moisture-wicking base layers (merino wool is excellent), a couple of mid-weight fleeces, a waterproof/windproof outer shell jacket and trousers, and a very warm, insulated down jacket for the summit.
- Bags: You will carry a daypack (25-35 litres) for your daily essentials: water, snacks, camera, rain gear, and extra layers. Your main gear will go into a large, soft-sided duffel bag or backpack (80-90 litres) which will be carried by your porter. There is a strict weight limit, usually 15kg, so pack smart.
- Sleeping: A four-season sleeping bag rated to at least -10°C is essential. Camps can get incredibly cold. A sleeping bag liner can add extra warmth. You can often rent these, but check the quality carefully.
- Headwear and Hands: A warm beanie, a sun hat or cap, and a buff or neck gaiter are all essential. You will need warm, waterproof gloves and a thinner pair of liner gloves.
- Essentials: A good headtorch with spare batteries is non-negotiable. Also pack sunglasses, high-SPF sunscreen, lip balm with SPF, personal first-aid kit, trekking poles (highly recommended for saving your knees on the descent), and water bottles or a hydration reservoir.
Getting Ready: How to Train for Your Trek
You do not need to be an elite athlete, but you absolutely need to train. The best training for walking is... walking. Your goal is endurance. For at least 3-4 months leading up to your trip, focus on long-duration cardio.
Aim for long hikes of 5-7 hours on weekends. If you can, find hilly terrain and incorporate it into your walks. Wear the boots you plan to trek in and carry a daypack with some weight in it to simulate trail conditions. If you live in a flat area, find a tall building and do stair repeats. A lot of them. Supplement this with regular cardiovascular exercise during the week like running, cycling, or swimming. While gym work for leg strength (squats, lunges) is helpful, nothing prepares you for the long, slow grind of a multi-day trek like getting hours on your feet.
Logistics and Ethics: Guides, Porters, and Park Fees
Organising a Kili trek is a significant undertaking, and it's vital to do it right. You are legally required to climb with a licensed Tanzanian guide and crew. Independent trekking is not permitted.
Your crew will consist of guides, a cook, and a team of porters who carry the tents, food, and your main duffel bag. These porters are the true heroes of the mountain, and their welfare is a serious issue. Unfortunately, some budget operators exploit their porters by overloading them, underpaying them, and not providing adequate food or equipment. When choosing an operator, don't just look at the price. Ask them directly about their porter policies. Responsible companies will be proud to tell you how they ensure fair wages, adhere to strict weight limits (20kg per porter under park rules), provide three meals a day, and ensure their crew has proper sleeping gear. Look for operators who are partners with recognised porter assistance projects. Your choice makes a difference.
A large portion of your trek cost goes towards national park fees, which are set by the Tanzania National Parks Authority (TANAPA). These fees cover conservation, trail maintenance, and rescue services. They are subject to change, so it's always wise to confirm the latest fee structure with your operator or by checking the official TANAPA website before you book.
Finally, tipping is a deeply ingrained and expected part of the culture on Kilimanjaro. Your crew works incredibly hard to get you to the summit. Operators will provide tipping guidelines. It is a significant extra cost that you must budget for. It's usually paid in cash at the end of the trek, often in a group ceremony, and is a wonderful way to show your immense gratitude.
Photography Notes from the Mountain
Kilimanjaro is a photographer's dream, but it presents challenges. The cold is your biggest enemy. Batteries drain much faster in freezing temperatures, especially on summit night. Keep your spare batteries in an inside jacket pocket, close to your body heat.
Summit night itself is tricky. It's pitch black for most of the climb, so unless you're carrying a tripod and have experience with astrophotography, your best shots will come after you reach the crater rim. The light at dawn is otherworldly. The sun hitting the glaciers, the shadow of the volcano stretching across the plains below—be ready for that moment. A wide-angle lens is fantastic for capturing the scale of the landscape, while a telephoto can be useful for compressing distant peaks. A polarising filter is a great addition for daytime hiking, as it will make the deep blue alpine sky pop and cut the glare from clouds and ice.
Beyond the Peak: Safari and Zanzibar
Climbing Kilimanjaro is an incredible achievement, but it shouldn't be the only thing you do in Tanzania. The country is a world-class travel destination. Moshi and Arusha, the base towns for the trek, are also the launching pads for the legendary northern safari circuit. Rewarding your tired muscles with a few days on safari, watching elephants in Tarangire, descending into the Ngorongoro Crater, or witnessing the Great Migration in the Serengeti, is the perfect follow-up adventure.
And after the dust of the mountain and the safari plains, there's the final, blissful reward: Zanzibar. A short flight takes you to this island paradise in the Indian Ocean. Its historic Stone Town, with its labyrinthine alleys and rich history, is a UNESCO World Heritage site. The island's beaches are postcard-perfect, with white sand and turquoise water. A few days of rest and relaxation here is the ultimate way to cap off an epic Tanzanian journey.
Explore in Depth
This guide is just the beginning of your Tanzanian adventure. The northern safari circuit is the perfect companion to a Kilimanjaro trek, offering a completely different but equally breathtaking experience of the country's natural wonders.
Frequently Asked Questions
What are the toilets like on the mountain?
Don't expect luxury. The public toilets at the campsites are basic wooden huts with a hole in the ground, known as "long drops". They vary in cleanliness. Along the trail, you'll have to find a spot behind a rock or bush. For this reason, many trekkers consider the "private toilet tent" offered by some operators as a non-negotiable upgrade. It’s a small, portable chemical toilet set up at each campsite just for your group, and it makes a huge difference to comfort and hygiene over a week-long trek.
How much cash do I need for tips?
Tipping is customary and a very important part of the crew's income. You should budget for it as a mandatory part of your trek cost. Your tour operator will provide clear guidelines, often a recommended amount per trekker per day, which is then divided among the guides, cooks, and porters. The total amount is significant, so be prepared. It's best to bring US dollars in clean, newer bills, as they are easiest for the crew to exchange. The tipping ceremony at the end is a lovely moment of mutual appreciation.
I'm a runner and very fit, can I do the climb in 5 days?
While your cardiovascular fitness is a great asset, it doesn't grant you immunity from altitude sickness. Acclimatisation is about time, not speed or fitness. Rushing the mountain on a shorter itinerary dramatically increases your risk of getting sick and not making the summit. I've met many super-fit people who had to turn back on 5-day routes. Give yourself the best chance by choosing a longer route of 7, 8, or 9 days. It gives your body time to adapt, making the whole experience safer and far more enjoyable.
Can I get a visa for Tanzania on arrival?
While it has historically been possible for many nationalities to obtain a visa on arrival at major airports like Kilimanjaro International (JRO), immigration policies can and do change. The most secure and recommended method is to apply for an e-visa through the official Tanzanian immigration website well in advance of your travel dates. This avoids uncertainty and potentially long queues on arrival. Always check the official government source for the most up-to-date requirements for your specific nationality before you travel.
What happens if I get sick and have to descend?
This is a key safety concern and your guides are experts in managing it. If you begin to show symptoms of moderate to severe altitude sickness, your head guide will make the call for you to descend, immediately. One of the assistant guides will accompany you down to a lower altitude, where you will almost certainly feel much better very quickly. Depending on the situation, you will either wait at a lower camp for the group to finish or be escorted all the way back to the park gate and to your hotel. Your safety is their number one priority.
Final Thoughts
Kilimanjaro is more than a mountain. It’s a personal journey. It will push you to your physical and mental limits, and then ask for a little more. It will strip away the non-essentials and force you to focus on the simple, profound act of putting one foot in front of the other. The discomfort is temporary, but the reward is permanent. It’s in the silence of the alpine desert, the camaraderie forged with your fellow trekkers, the incredible commitment of your Tanzanian crew, and the unforgettable moment you stand on the roof of Africa, watching a new day begin.
If you're thinking about it, my advice is simple: do it. Prepare properly, choose a responsible operator, respect the mountain, and go slowly. It will be one of the hardest, and best, things you ever do.
More Tanzania guides
Serengeti and Ngorongoro: Parks, Timing, Wildlife
How the Serengeti and the Ngorongoro Crater differ, where to stay in each, and how to time a visit around the migration.
Tanzania Safari Guide: Serengeti and Ngorongoro
Planning a first Tanzanian safari: the northern circuit, the migration calendar, camps versus lodges and what a day looks like.